
Pot Painting for Beginners: A Simple Guide
- House of Craftivities
- May 19, 2025
- 5 min read
Ever looked at a basic plant pot and imagined it as a canvas? You're in the right place! We're excited to share Pot Painting for Beginners: A Simple Guide with our founder and resident artist, Plavaneeta Borah. Plav believes that anyone can be creative, and painting pots is a fantastic way to start. We will cover everything from choosing the right pot and paint to sealing your finished masterpiece, offering simple steps and valuable tips to help you create something beautiful for your home or garden.
Q: Thanks for joining us, Plav! Pot painting seems like a fun entry point into DIY and art. Why do you think it's great for beginners?
A: Thanks for having me! I think pot painting is absolutely perfect for beginners because it's low-pressure and instantly rewarding. You don't need a lot of fancy supplies or prior experience. You're working on a 3D surface, which is different from a flat canvas, but pots are forgiving! A few strokes of paint can completely transform a simple terracotta pot into something special. It's a chance to experiment with colour and design without feeling intimidated. Plus, you end up with a beautiful, functional item for your plants!
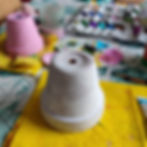
Q: For pot painting for beginners, what kind of pots are best to start with? Should one go for terracotta, ceramic, or something else?
A: For pot painting for beginners, I always recommend starting with plain terracotta pots. They are affordable, widely available, and their porous surface holds paint really well once prepped correctly. Painting terracotta pots is a classic choice and super convenient. Ceramic pots can also be painted, but it requires glazing and also a different preparation. Plastic pots can work too, but they can be less breathable for plants and might require specific plastic-friendly paints and sealers. Stick to terracotta to keep it simple when you're starting out.

Q: Speaking of prep, what’s the first step once I have my terracotta pot? Do I need to clean it? Prime it?
A: Absolutely! Preparation is key to making sure your paint sticks and lasts. For a new terracotta pot, you should wipe it down with a damp cloth to remove any dust or debris. If it's a used pot, clean it thoroughly with soapy water and a brush to get rid of any soil, mineral deposits, or old paint. Make sure it's completely dry before you start painting – terracotta is porous and holds moisture.
Priming isn't strictly necessary for all paints on new terracotta, but it can help the paint adhere better, especially if you're using acrylics, and can prevent the porous pot from absorbing too much paint. A basic white acrylic primer or a spray primer suitable for masonry or terracotta works well. If you skip primer, you might need a few extra coats of your coloured paint.
Q: Okay, the pot is prepped. What kind of paint should I use? There are so many options!
A: This is a great question, and choosing the best paint for pots depends a bit on where the pot will live. For indoor pots, standard acrylic craft paints work wonderfully. They are water-based, easy to clean up, come in a huge range of colours, and dry quickly.
If your pot will be outdoors, you need paint that can withstand the elements. Exterior acrylic paints are designed for this, offering better durability and UV resistance. You can also get acrylic enamel paints that create a harder, more weather-resistant finish. Some spray paints are also suitable for outdoor use on pottery.

Q: What about design ideas for beginners? Any simple techniques or patterns you recommend?
A: Don't overthink it when you're starting! Simple is often very effective. Solid colors are a great start – maybe a few pots in varying shades of your favourite colour. Stripes are easy with a bit of painter's tape for clean lines. Polka dots are fun and forgiving – you can use the end of a paintbrush or a pencil eraser to make perfect dots.
Abstract designs are also fantastic for beginners – just use different colours and brushstrokes to create unique patterns. You can also try simple geometric shapes or freehand doodles. Don't be afraid to mix colours right on the pot or embrace imperfections – that's part of the handmade charm of DIY pot painting!
Q: After painting, do I need to do anything else? Like sealing the pot?
A: Yes, sealing is a crucial step, especially if the pot will be used for a living plant and will be watered, or if it's going outdoors. Sealing painted pots protects your design and the paint from moisture both from inside the pot (as water seeps through the terracotta) and from the outside (rain).
You should seal both the inside and outside of the painted pot. For the inside, use a waterproof sealant specifically designed for pottery or masonry. This prevents moisture from the soil from pushing the paint off from the inside. For the outside, use a clear, exterior-grade sealant. You can find these as brush-on liquids or spray sealants in matte, satin, or gloss finishes. Apply a couple of thin coats, allowing each to dry fully according to the product instructions.
Q: What are some common mistakes beginners make, and how can they avoid them?
A: One common mistake is not cleaning or drying the pot properly before painting, which can lead to poor paint adhesion. Another is skipping the sealing step, especially on the inside of terracotta pots, which almost guarantees the paint will eventually bubble or peel due to moisture.
Using the wrong type of paint for outdoor pots is another – standard indoor acrylics just won't last outside. Also, applying paint too thickly can lead to chipping; thin, even coats are always better, even if you need several of them to get opaque coverage. Finally, not letting each layer of paint dry completely before adding the next is a recipe for smudges or damaged finishes. Patience is key in the drying stages.

Q: Any final tips for painting pots for someone just starting out?
A: Don't strive for perfection on your first few pots! Enjoy the process. Use old clothes and cover your work surface. Have fun with colour combinations. If you mess up, you can often wash off wet acrylic paint or paint over dried mistakes. And remember to seal, seal, seal! It makes all the difference in how long your beautiful creation lasts. Pots are relatively inexpensive, so they are great for practicing techniques before perhaps moving onto painting ceramic pots or larger, more intricate projects.
Q: Thanks so much, Plav, for sharing your insights!
A: My pleasure! I hope this encourages everyone to give pot painting a try. It's a simple way to add some hand-made beauty to your space. Happy painting!